>
I found this antique Duncan Phyfe drum table on Craigslist for $30. It was an interesting shape and I figured would be a good chance to practice some new finishing techniques. Particularly, I wanted to learn how to get as close as possible to the Restoration Hardware gray wood finish that is so in vogue right now.
The piece poses a challenge as it has a leather top and fine mahogany veneers on the entire drum portion. Sanding was a challenge, and because I’m pregnant, I opted not to use a stripper, though it probably would’ve been a bit easier.
Here’s the after (i know, i know, but it’s so much fun to see it first!)
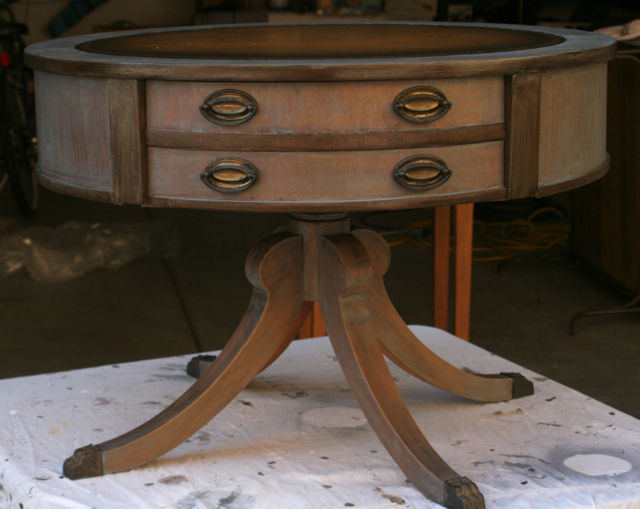 |
Here’s the before shot:
 |
||
| a dark, tattered looking Duncan Phyfe drum table |
 |
| good scratches and uneven colors due to sun damage |
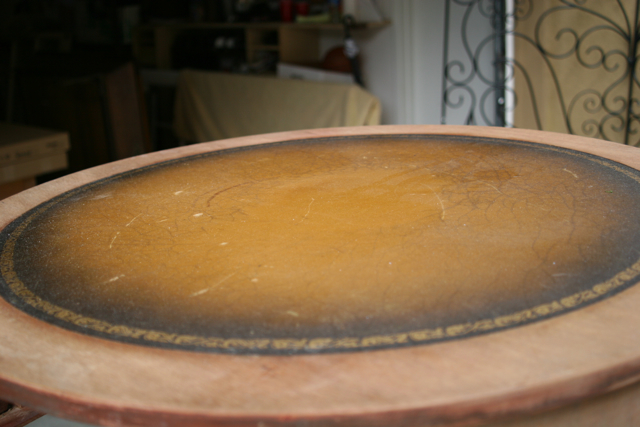 |
| cool leather top, but very faded and scratched |
 |
||
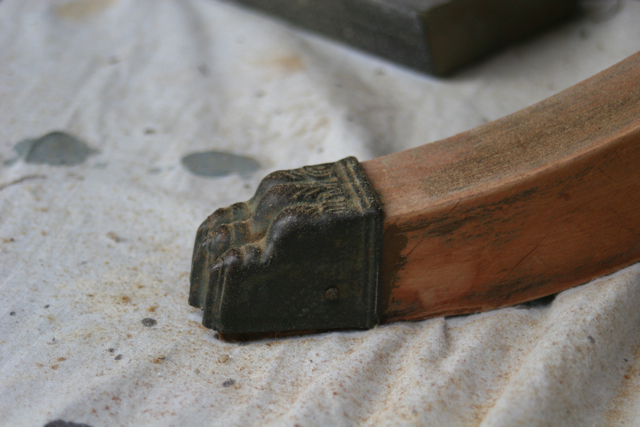
| super detailed claw feet on each of the 4 legs |

a good lesson was learned on this project. always sand with the grain. i got lazy in places, and because i wanted the grain to show, i used a stain rather than paint…the veneer ended up showing the sanding against the grain. doh!!!
i inherently suspected this to be the case in the back of my mind, but i was lazy lazy lazy. darn!! you can see the bottom where i rubbed left to right instead of up and down.
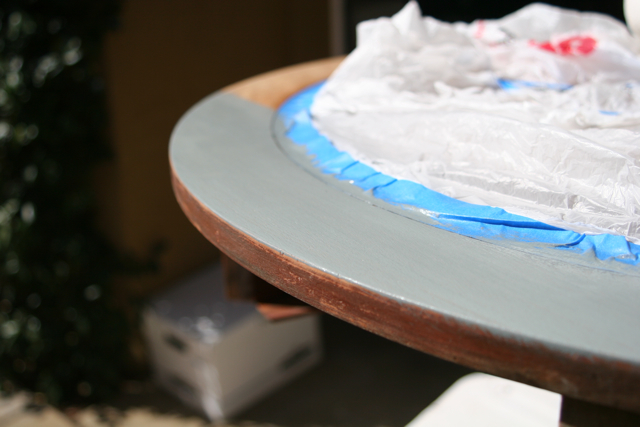 |
| after sanding the entire piece with 140 grit paper, i used minwax clear tint base stain in charcoal gray |

when working with the stain, i had to work quickly and wipe off the stain as the wood was so dry. i tried as best as possible to wipe with the grain, but it was difficult in the nooks and crannies.
 |
| you can see the poor sand job on the left side of the piece. i’m just not sure how to sand in that tiny area to reach all the way down to the crevice! i’m sure there’s a tool for this somewhere…some sort of tiny triangular tool. i don’t know! |
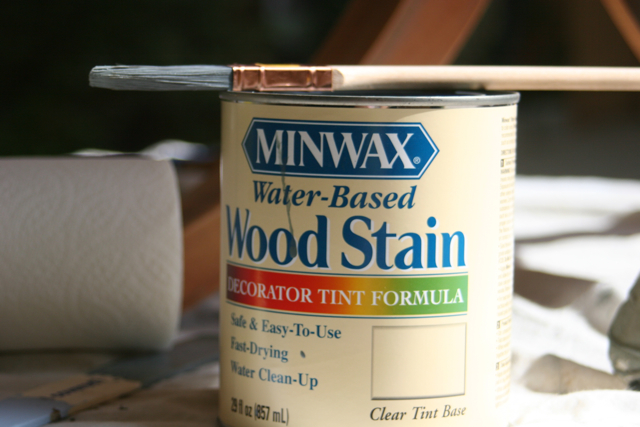 |
| here’s the stain i used. clear tint base Minwax wood stain in charcoal gray. allows the wood grain to show through. |
 |
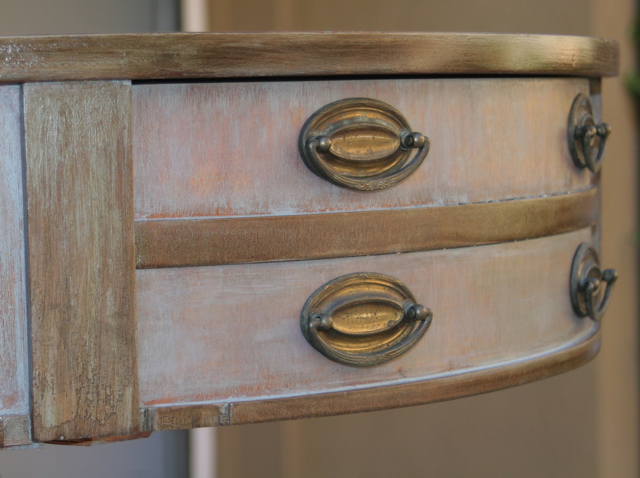
| i started layering the different colors. here, i used an Ace Hardware walnut oil-based stain + Behr glaze and wiped off with a wet rag. this started giving depth. probably did three layers of each walnut and gray. |
 |
| i used an approximate 1:2 walnut:glaze mix. this is before i stirred it all up. still gloopy. |
 |
| ace hardware wood stain in walnut |
 |
| another layer of gray stain… |
 |
| i sanded on high points between the alternate stain and glaze colors to give more depth. |
 |
| i decided to go over the whole drum part of the piece with the dark stain to give it more definition. the shape is so unique that i wanted the edges to stand out. |
 |
| here is a darker shot |
 |
| and a lighter shot….the true color is somewhere between the dark and the light photos. this light shot is too blue and white washed. |
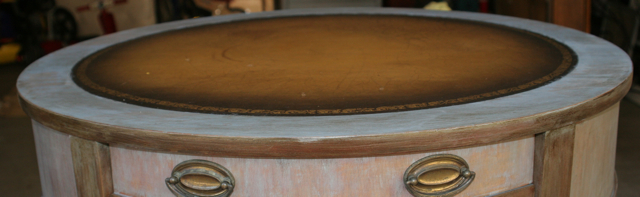 |
| i thought i’d try the walnut stain on the leather…definitely helped to darken it up. i think i’m going to cut a piece of burlap to it, though husband likes the beat up leather. no need to attach the burlap, but a removable ‘doiley’ (is that how you spell it?) is a nice option to add more texture. |
|
| and here she is…voila! |
i was trying to replicate the gray washed Restoration Hardware look. wasn’t too difficult, but given that i didn’t completely strip this piece, it didn’t get the full effect, especially in the legs.
but this is a cool piece that will sit in the corner to hold our remote controls and a lamp….probably will end up with zillions of tiny fingerprints from tiny people playing trucks and trains on it.
linking to:      


hope you enjoyed this as much as i did!
>AH-MAZING!.. Love it!..
>Lots of work, but it turned out so good. Thanks for linking to WUW.
>I love your little table! Love the transformation!
>Your table is fantastic! Even if you didn't get the exact finish you were after I'd say you rocked that table girl! I hear ya on the little nooks and crannies, here's what you need: http://www.blackanddecker.com/power-tools/MS800B.aspxYou can grab that little life saver at wal mart even! 🙂 happy sanding!
>Thanks everyone! Definitely learning a lot through trial and error. Lisa, the B&D sander looks great. Thanks for the tip!!
>That looks fantastic.Kathy
>LOVE THIS! Come on ova' and link up to my Linky Party! xoxokara *ENTER LINKY PAR-TAY Here! *
>What a great piece. Fabulous transformation!!Thanks for sharing the how-to.
>Such a great little table! Love its new look!
>It is a gorgeous transformation!! Looks very expensive as well…great job!!Come and enter my giveaway for bath & body!xoxoKarenaArt by Karena